Saturday, July 25, 2009

Spiders, Swelling and Super Neighbors

If Oliver could tell this story he would tell you this morning was the best morning ever. I personally have had better. The day started for me with a strange sharp sensation in my shoulder. I rubbed my shoulder and was surprised to find a raisin there. Then I opened my eyes and realized there were long, creepy legs everywhere and the raisin was actually a smashed spider. (Oliver is holding the pieces of the spider in the photogrpah below).

I have a bit of a spider phobia so having one smashed on my body was not the best way to start a Saturday. I went into the bathroom and noticed that my eyes were looking strange. Oliver and I watched as one eye started developing hives and began swelling. Recently at work we had anaphylaxis training so I was especially concerned that my eye had started swelling quickly. I drank some liquid Zyrtec and hoped for the best.

About ten minutes later, I began having difficulty swallowing. Glenn was at work and I was home alone with Oliver. Although we live 20 minutes away from the nearest hospital, we happen to live across the street from our local fire station. We walked over and found four young firemen doing their morning workout regimen and I instantly wished I had taken the time to put on a bra. (Below is a picture of Oliver and his cousin Owen waving at the fire truck last Spring).

The firemen had no access to an EpiPen and decided it would be best to call an ambulance. They sat me in the fire station, gave me some oxygen and took my vitals. This is where Oliver's life got really good. Oli was given a fireman hat, stickers and a bracelet. Then two of the firemen asked Oliver if he wanted to play in the truck. As we waited for the ambulance to arrive we could hear Oliver over the loudspeaker, "Hi, Mommy! I love you Mommy!" One of the firemen came back in to the fire station with a walkie-talkie. Oliver apparently wanted to talk to me. "What's your 20?” he asked. The firemen with me told me to say, "The fire station. What's your 20?" Oliver listed the number of his engine.

Over the loudspeaker Oliver announced, "The ambulance is here Mommy!" The Zyrtec seemed to be kicking in by the time the ambulance arrived, and after an assessment, I was cleared to go back home. I found Oliver on the shoulders of a fireman looking for lizards. We walked across the street to our property and Oliver asked if I could get a spider bite again soon. We'll be back at the fire station tomorrow with cookies. Thank goodness for our great neighbors!
Saturday, July 18, 2009

The Dos and Don'ts of Rattlesnake Relocation

Pumpkin tried to attack a rattlesnake last night. Grammy heard him barking frantically then observed him trying to bite a small animal. She promptly pulled Pumpkin off his prey, an adolescent rattlesnake. The snake was pissed off. We watched him carefully as he rattled his tail next to Pumpkin's dog house. There were two sensible options. 1. Kill him. 2. Leave him alone. Kill him was out. We also didn't want to leave him in Pumpkin's enclosure because we knew Pumpkin would be all over him in the morning.

Luckily, we had been drinking wine, which helped us come up with a more creative plan. This is what I learned from my experience last night.

DON'T wear old, baggy jeans for snake removal when your bum could potentially be in all the photographs.

DO put on bee gloves and boots for a false sense of security.
DON'T assume you can lightly nudge a snake and it will crawl into a recycling bin. The snake will quickly crawl under the bin toward your feet.

DO sneak up behind the snake and flick it into the recycling bin.

DON'T drop the bin as you attempt to stand it up. It will make everyone watching you jumpy.

DO make sure your toddler has a healthy fear of rattlesnakes (but don't freak him out too much, snakes are cool).

DO drag the recycling bin as far away as possible from your house.

DON'T do it when the neighbors are watching.

DO let the neighbors know that you have a squirrel in the recycling bin if anyone asks.

DO relax and enjoy another glass of wine knowing that you worked hard to relocate a snake, and put yourself in danger, but the snake will likely be back in the dog's enclosure by morning.

Wednesday, July 8, 2009

Do you want to make lip balm?

I thought it would be kind of fun to do a tutorial on my blog. I was trying to think about what I do that not many people know how to do. My work experience in the veterinary and medical fields has provided me with a few talents I considered sharing. Hmmm, I know how to express a dog's anal glands, I could share that with the world. Or what about treating genital warts? It's a useful skill occasionally (although you do need to have access to acid or a cryo tank). All of my ideas seemed a bit inappropriate. I finally decided to share my side job, lip balm making. And don't worry; I wash my hands really well.

So, here it is, step by step.

Step 1: MELTING THE BEESWAX. We get raw beeswax from a local guy who uses no chemicals on his hives. Glenn then filters it and saves it in these handy one ounce molds. I know one ounce of beeswax will make one batch so it saves us from having to weigh the dry beeswax. We use a double boiler to melt the wax. Beeswax is highly flammable so never leave it!


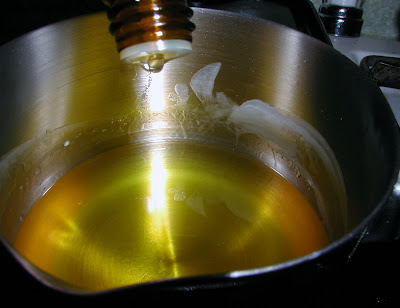
Step 2: HEATING AND MIXING THE OILS. We heat organic almond oil and organic jojoba oil in a little pot (never over an open flame). Then we add to it heated coconut oil. I like to use about 50% liquid at room temperature oil with 50% solid at room temperature oil (coconut oil)/beeswax mixture. You can change the ratios depending if you want a hard or soft lip balm. I add the beeswax last. Keep the temperature just high enough to keep the beeswax melted.

Step 3: ADD THE ESSENTIAL OIL. This is the last step as the essential oils will burn off quickly. I used organic lavender oil for this batch. Don't attempt to take a picture of yourself during this step as you will lose count of the drops. I do about two drops/tube of the lavender oil.

Step 4: POUR THE MIXTURE INTO CONTAINERS. If you have a toddler, he or she will start begging to be held during this step, then throw a tantrum as you frantically try to pour the mixture into the tubes before the oil burns off. I recommend a Winnie the Poo video. This part takes practice, but is easily mastered. My sister invented our handy lip balm holder (you can buy holders for those round tubes, but not for our oval tubes). If we ever make it big with our business, I'm giving her ten dollars of gratitude. So you want to fill up the tubes (if you are even using tubes, you can pour the mixture into any old container) to 2 cm from the top. Wait until it has cooled then fill it the rest of the way. Let cool completely, then cap.


It's totally easy and my lips have never felt better. Feel free to e-mail me if you need more info. Maybe I will write about something more challenging for my next tutorial, like the hand maneuvers for delivering a baby. You never know when you will have to deliver a baby on the side of the road (I keep hoping but to my dismay it has never happened). I'll leave you with a pretty picture of the bees in our artichoke plant. I hate having an entire post with dull pictures! Jess